How to practise letters in shape groups
Most handwriting practice treats letters as individuals. You work on your a, then separately on your d, then somewhere down the line on your g. The problem with that approach is that a, d, and g are not really separate problems. They all begin with the same oval stroke. Fix the oval, and you fix all three at once.
This is the principle behind shape grouping: letters that share a starting stroke or a core movement belong together in practice, not spread across separate sessions. It is a more efficient use of practice time, and it tends to produce faster results because your hand is learning a movement, not just a letter.
Why this works
When you write any letter, your hand is executing a sequence of muscle movements, not drawing a shape from memory. The difference matters, because muscle memory is built through repetition of specific movement patterns.
When you practise a in isolation and d in isolation, you are building two separate practice histories that happen to share a common opening movement. When you practise them together, that shared movement gets twice the repetition in the same amount of time. The hand learns the oval more deeply, and the differences between the letters (where the stroke goes after the oval) become easier to control because the starting point is consistent.
There is a second benefit that is less obvious: practising similar letters together forces you to notice how they differ. Writing n and m side by side makes the arch count impossible to ignore. Writing h beside both of them shows exactly where the descender changes the shape. Contrast within a session sharpens attention in a way that isolated practice does not.
The shape families
Lowercase letters fall into a handful of families based on their core stroke. These are not rigid categories, and some letters could reasonably sit in more than one group, but for the purposes of practice, the groupings below are the most useful.
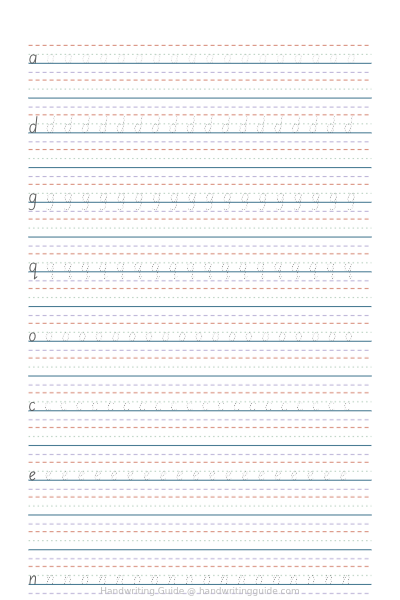
The oval family: a, d, g, q, o, c, e All of these begin with a counterclockwise oval or partial oval. The a, d, g, and q complete the oval and then exit in different directions. The o closes it. The c and e begin the same way but leave it open.
The arch family: n, m, h, r, p, b These letters begin with a downstroke and then lift into an arch (or in the case of m, two arches). The arch height, width, and where it lands are what distinguish them from each other.
The diagonal family: v, w, x, y, k, z Letters built from diagonal strokes rather than curves or arches. These are the ones that tend to feel disconnected from the rest of a person's handwriting, because the movement is different in kind, not just in detail.
The straight family: i, t, l, j Simple downstrokes with small additions: a dot, a crossbar, a curve at the base. Often neglected in practice because they look easy, but inconsistency here is surprisingly visible in finished writing.
Three letters sit outside these groups entirely: f, s and u. They are worth practising on their own, as isolated shapes, before mixing them into free writing.
Before you begin: find your weakest group
There is no point working through every family in sequence if one of them is clearly responsible for most of your problems. Spend two minutes before your first session doing a simple diagnosis.
Write the following sentence at your normal speed: The quick brown fox jumps over the lazy dog. It contains every letter of the alphabet. Put the page at arm's length and look at it without reading it. Look at the shapes.
Which letters look different from their neighbours? Which ones look slightly wrong even when you cannot immediately say why? Those are your starting points. If the oval-family letters are inconsistent, start there. If your arches look flat or crowded, start with the arch family. You will get to the rest, but the weakest group deserves the most urgent attention.
The method
The same five-step process applies to any shape family. Work through it once for whichever group you are starting with.
Step 1: Isolate the shared stroke
Before you write any letters at all, practise the stroke that the group has in common. For the oval family, that is a slow, controlled counterclockwise oval, repeated across a line. For the arch family, that is a downstroke followed by a smooth arch that lands at x-height. For diagonals, it is the diagonal stroke itself, both directions.
Write two or three lines of nothing but that stroke. This is the warm-up for the group, and it is where the muscle memory begins.
Step 2: Add the first letter
Take the first letter of the group and write it slowly, focusing on how it begins with the stroke you just practised. Write a full line. Notice where the letter exits or departs from the shared stroke. That exit point is where most errors live.
Step 3: Add letters one at a time
Add the second letter of the group. Write a line alternating between the first and second: a d a d a d, or n m n m n m. Then add the third and alternate across all three. Do not rush through this. The goal is to feel the shared opening and the different endings, not to fill the page.
Step 4: Write the group together
Write a line of all the letters in the group in sequence, without alphabetical pressure. Just the shapes together. Then write them again, mixing the order. By this point the shared stroke should feel automatic, and your attention should be free to focus on the differences.
Basic print (slanted) - By shape group
Print letters grouped by shared stroke shapes on four-line guides. Each group includes dotted tracing rows followed by empty guided lines for copy practice.

Basic cursive - By shape group
Cursive letters grouped by shared stroke shapes on four-line guides. Each group includes dotted tracing rows followed by empty guided lines for copy practice.
Step 5: Use them in real words
The final step is the most important and the most commonly skipped. Practice strokes only transfer to real writing if you give them a chance to land in context. Find words that are heavy in the letters you have just practised.
For the oval family: cargo, dagger, guard, cloud, dragon. For the arch family: manner, brown, human, horn, manner. For diagonals: vivid, twelve, wax, luxury, zero. Write a few lines of these words at a slightly slower than normal pace, not drill-slow, but deliberate enough that the shapes have room to form correctly.
The purpose of a drill is to make the stroke automatic. The purpose of a word is to check that it stayed that way.
on the gap between drill and real writingWhat to watch for in each group
Every family has its own failure point: the place where writers typically lose control after the shared stroke.
In the oval family, the shared oval is usually not the problem; the exit is. The a exits with a small upstroke on the right. The d continues up into a full ascender. The g descends below the baseline. The q descends to the right. If your oval-family letters look similar to each other when they should look different, you are completing the oval correctly but not committing clearly to the exit. Exaggerate the exits in practice until the differences feel large, then dial them back.
In the arch family, the most common error is an arch that is either too wide or too narrow. A wide n arch looks like an u. A narrow m arch produces a letter that looks cramped or blurred. The arch should land at x-height and then continue cleanly downward. Watch also for h: because it has an ascender, writers sometimes change how they start it, when in fact the downstroke-then-arch is identical to n, just taller.
In the diagonal family, the problem is usually angle inconsistency. If your diagonals slope at different angles from letter to letter, or from one side of a letter to the other, the writing looks restless even when the proportions are right. Pick an angle that feels comfortable and commit to it across the whole group.
In the straight family, watch the crossbar on t and the dot on i and j. These small additions should be at a consistent height across the page. A t with a high crossbar next to one with a low crossbar looks like two different letters sharing a name.
Moving into real writing
Once you can write the letters of a group consistently in drills and in targeted words, the next step is to stop thinking about the group at all and write normally.
This is intentional. Over-attending to individual letters during free writing undoes some of the automaticity you have been building. The goal of the drill phase is to get the movement below the level of conscious attention, to make the oval so reliable that you do not have to think about it when it appears in the middle of dragon or cargo at full speed.
After a session of focused group practice, spend the last two minutes of your time writing freely: a sentence you want to remember, a line from something you are reading, anything. Then look at the oval-family letters (or whichever group you have been working on) and see whether they look more consistent than they did yesterday.
That is the feedback loop. When the answer is consistently yes, you are done with that group for now. Move to the next one.